Rotate Image Online
Use our free Rotate Image Online tool to rotate photos clockwise or counterclockwise while maintaining image quality. Supports all popular image formats and works on any device.


Rotate Image Online:
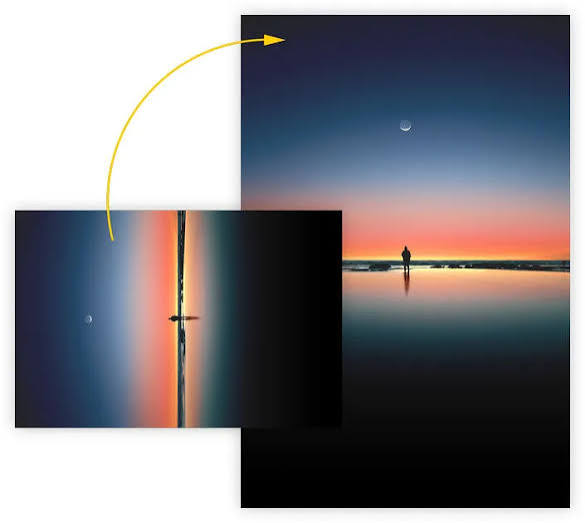
You know that moment — you open a photo and your neck automatically tilts sideways just to look at it right. That's pretty much the universal sign something needs rotating. Maybe you scanned a document and it came out on its side. Maybe your camera decided a landscape shot should be portrait for reasons known only to it. Either way, you're not stuck. Rotating an image online takes less time than it just took your neck to do that. Here's how it actually works, why photos end up sideways in the first place, and what to watch for so you don't make things worse in the process.Try Imaglora now to fix it.
Why Do Photos Even End Up Sideways in the First Place?
This part actually surprises a lot of individuals. Most of the time, the photo itself was never really "sideways", your phone or camera saved it correctly, but it additionally attached a tiny invisible instruction inside the file called orientation data. That instruction tells apps "hey, display this rotated 90 degrees" so it appears upright. The problem reveals up when a website, app, or older piece of software doesn't bother reading that instruction. Suddenly the photo you took perfectly straight loads sideways or even upside down on someone else's screen, even though nothing about the actual image changed. This is exactly why the same photo can look fine on your phone but rotated wrong the moment you upload it somewhere else.
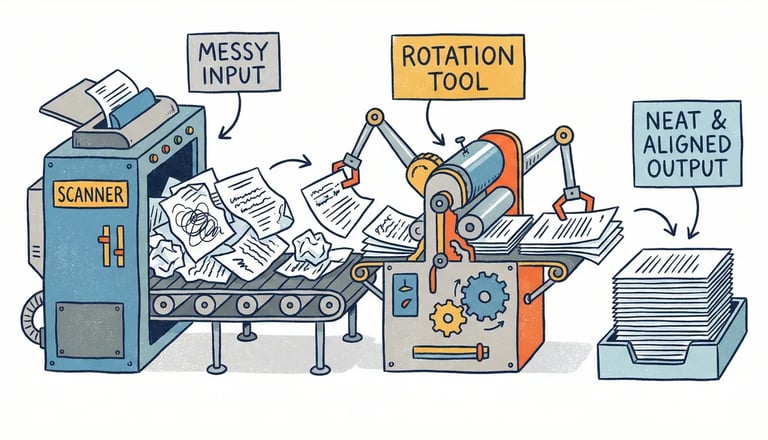
Scanned documents run into a similar issue, just without the invisible instruction — if you fed the paper into the scanner the wrong way, the scan itself really is sideways, and there's no hidden fix. That one actually needs a real rotation.
Difference between Rotate, Flip, and Mirror
Before jumping into the steps, it's worth clearing up something people mix up constantly: rotating, flipping, and mirroring are three completely different actions.
Rotating spins the entire image around a central point, like turning a clock hand — 90, 180, or 270 degrees. Flipping turns the image vertically, so the top and bottom trade places, like a reflection in a pond. Mirroring flips it horizontally instead, swapping left and right, which is the effect you get from an actual mirror.
If your photo is sideways, you want to rotate it. If someone's holding a sign and the text reads backward, you'd want to mirror it. Confusing the two is one of the most common slip-ups people make, and we'll get back to that in a bit.
How to Rotate an Image Online
Here's where things get refreshingly simple. Most online rotation tools follow the same basic flow, and once you've done it once, you'll never need instructions again.
Step 1: Open the Photo in a Rotation Tool
Head to an online image tool — something like Imaglora works well here since it handles rotation without forcing you to install anything or dig through complicated menus. Look for the upload area, usually right in the center of the page, and either click to browse your files or just drag the image straight in.If you're rotating a scanned document, make sure you're grabbing the actual scanned file and not an older version sitting in the same folder.
Step 2: Pick Your Rotation Direction
Once the image loads, you'll usually see rotation controls — buttons for turning it 90 degrees left or right, sometimes a slider for finer, custom angles if the photo just needs a small straightening tweak rather than a full quarter-turn.A quick way to figure out which direction you need: look at which way the top of the image is currently facing, then rotate toward wherever "up" should actually be. If a photo is lying on its left side, you'd rotate it clockwise to stand it back up. If it's on its right side, rotate counter-clockwise.
Step 3: Preview Before You Commit
Most decent tools like Imaglora show you a live preview as you rotate, so you can see the change happening in real time instead of guessing and hoping. Take a second here — this is especially useful for scanned pages, since text needs to read correctly.
Step 4: Download the Corrected Version
Once it looks right, hit download, and the rotated image lands in your downloads folder, ready to use. If you were fixing a batch of several photos, a lot of tools let you rotate the whole set together instead of repeating this for every single file.
That's genuinely the entire process. No design software, no confusing menus — just upload, rotate, download.
Tips That Make Rotating Images Less Annoying
Rotate before you resize, not after. If you're planning to also resize or crop the image, rotate it first. Doing it the other way around sometimes throws off your crop dimensions since the image's width and height essentially swap places after a 90-degree turn.
Save a copy instead of overwriting the original. This one's easy to forget in the moment. If the rotation doesn't come out exactly right, or you realize later you actually needed the original orientation for something else, you'll want that untouched file still sitting there.
Double-check text-heavy images extra carefully. For scanned pages, receipts, or anything with text, a slightly-off rotation is way more noticeable than it would be on a regular photo, since text is immediately obvious to the eye.
Use a tool that keeps quality intact. Rotating shouldn't blur or degrade your image if the tool is built properly. If you notice the rotated version looking noticeably softer or lower quality than the original, that's usually a sign the tool is re-compressing the file unnecessarily — worth switching to something more reliable like Imaglora instead.
Mistakes People Make When Rotating Images
Mirroring when they meant to rotate. As mentioned earlier, this mix-up happens constantly. If your photo just needs to stand upright, you want rotation, not a flip or mirror — those change the actual left-right or top-bottom orientation instead of just turning the whole image around.
Rotating the same file repeatedly through lossy re-saves. If you're working with a JPG and rotating it multiple times through different tools, you can occasionally introduce small quality loss with each re-save. Rotating once through a solid tool avoids this entirely.
Forgetting that rotation changes the image's dimensions. A 1200x800 photo becomes an 800x1200 photo after a 90-degree turn. If you're placing it into a template, document, or specific layout afterward, that swapped width and height can throw things off if you're not expecting it.
Rotating a whole batch without checking each one first. Not every sideways scan is sideways in the same direction. Applying one rotation angle to a whole folder assuming they all need the same fix can leave some documents even more wrong than before.